A deepdive into Meta Ads Tracking
Meta
Ad tracking is the baseline of determining whether your conversion driving ad campaigns are going to be successful or not. Meta as an organisation has been at the forefront of both innovation and mature ad tracking since the early days of Facebook. This blog post explores what good looks like for advertisers / agencies who want to get the most out of Meta’s ad products by empowering the right signals to come in. But also being mindful of data privacy, newer ad policies and increasing complexity within a Meta ecosystem moving towards AI first even within a tracking world.
The Basics - Pixel
Starting with the very basics, the large majority of brands would be used to the implementation of the Meta Pixel. This is a client side JavaScript library that should be installed on your website, either directly or through the use of a tag manager (like GTM / Tealium / Ensighten / Adobe Launch) or through plugins (Shopify / Wordpress) based on the type of domain.
The code is split into 2, the core base tag which should be implemented everywhere & the event tag which is specific to key events you want to consider tracking for reporting / optimisation / bidding. This is the crux of the fbevents.js library that we will dig into later. And every event is called with a fbq track payload, the Meta way for sending structured data back to its endpoints.
<script>
  !function(f,b,e,v,n,t,s)
  {if(f.fbq)return;n=f.fbq=function(){n.callMethod?
  n.callMethod.apply(n,arguments):n.queue.push(arguments)};
  if(!f._fbq)f._fbq=n;n.push=n;n.loaded=!0;n.version='2.0';
  n.queue=[];t=b.createElement(e);t.async=!0;
  t.src=v;s=b.getElementsByTagName(e)[0];
  s.parentNode.insertBefore(t,s)}(window, document,'script',
  'https://connect.facebook.net/en_US/fbevents.js');

  // 1. Initialize the Pixel with your unique ID
  fbq('init', 'YOUR_PIXEL_ID_HERE');

  // 2. Track the automatic PageView event
  fbq('track', 'PageView');
</script>
<noscript>
  <img height="1" width="1" style="display:none"
       src="https://www.facebook.com/tr?id=YOUR_PIXEL_ID_HERE&ev=PageView&noscript=1"/>
</noscript>
Your Pixel ID is unique to you as a brand but it is up to you how you use it. For example you can have 1 pixel for:
- Multiple domains
- Multiple markets / countries
- Multiple brands (not recommended)
It is also relevant to how you want to optimise / report your Meta ads, as Meta now creates a dataset from your Pixel, which can then be associated to ad account(s)..
For Event tracking, there are a few components based on whether the event is standard to Meta or not, the parameters you want to passback with it and how dynamic it needs to be, especially with regards to order value.
Meta has several Standard Events, which as we will see later are quite important if you want to gain the power of Meta’s vast algorithmic learnings beyond just the signal you are giving it. This includes:
| Standard Event | Description / Definition |
|---|---|
| Search | for a search triggered event on a page |
| ViewContent | for a land on a product page / product detailed page |
| AddToCart | for adding a product to a basket, primarily for ecommerce |
| InitiateCheckout | for starting the checkout process |
| AddPaymentInfo | for the signal of starting to input payment details but note for privacy centric brands, this is avoided |
| Purchase | for the final confirmation of an action, monetary or not |
| Lead | for a submission of a lead generation |
| CompleteRegistration | for a registration event |
Others also exist like Schedule / Subscribe / SubmitApplication
For each event you can also passback parameters, some of which are mandatory for both reporting and optimisation. You can also passback your own custom parameters but when in Core setup for certain brands, this is not allowed anymore.
Ecommerce in particular would at a minimum require a content ID (product ID), currency, content type (product vs product group) and value (order value or basket value) in order to not only get accurate reporting but allow the ability to use product feeds with dynamic remarketing.
// Example: Standard Event for adding an item to a cart
fbq('track', 'AddToCart', {
  value: 49.99,
  currency: 'GBP',
  content_type: 'product',
  content_ids: ['SKU-12345']
});
The First Consideration
When we think about Events, some advertisers have bespoke events that they either want to hide from Meta to not allow them to gather information on what it is or just need a custom approach. This is where custom events can be useful, to send to Meta as a brand new event.
But with this comes the first challenge. If you pass a custom event called “Sub-A-Brand” and you are the only advertiser in the world that does this, even if you label this event in a certain way, Meta cannot very accurately use it to model against for algorithmic gains outside of the signals you give it. So if the signal is low / limited fires, it is a challenge to optimise with. Therefore it is always best practice to use standard events alongside custom events, even if you don’t want to, to allow Meta’s ability to gather data beyond just your pixel’s signal.
The other reason for this is that custom events require custom conversions to optimise / report with. These are 2 different things and you require building a custom conversion off a custom event in order to use it. There is a strict limit of 100 custom conversions for a single account to be factored in also.
Finally if you are implementing custom events on a website with multiple pixels, always use the fbq('trackSingleCustom', 'YOUR_PIXEL_ID_HERE', 'EVENT_NAME') code approach, otherwise you will end up sending the custom event to all pixels on the page.
Server Side Tagging and Conversion API (CAPI)
In the past, just implementing a Meta Pixel was enough for Meta to operate efficiently. This is no longer the case, based on both regulatory and technical updates over the years, specifically with regards to Apple.
Pixels at the end of the day that are implemented with client side JavaScript are based on 1 specific key currency: a cookie. A cookie that is either 3rd party in context (as facebook.com) or 1st party (which is the default these days for Meta to hide their script behind the advertiser’s domain). But both still are limited to how they operate when implemented via a browser.
Whilst there are other features that Meta have incorporated, including advanced matching as we will talk about later, a server side approach is best in class for signals going into Meta, not only based on the ability to do more but also having control / transparency on what you want to send to Meta as a brand.
In a nutshell, CAPI is sending signals directly from a server to Meta, which is then exposed in the same base Pixel ID you have set up. Behind the scenes, there is an access token that allows this process to occur.
The technical detail is a POST request that is sent via API:
curl -X POST \
  -F 'data=[
       {
         "event_name": "Purchase",
         "event_time": 1762902353,
         "user_data": {
           "em": [
             "309a0a5c3e211326ae75ca18196d301a9bdbd1a882a4d2569511033da23f0abd"
           ],
           "ph": [
             "254aa248acb47dd654ca3ea53f48c2c26d641d23d7e2e93a1ec56258df7674c4",
             "6f4fcb9deaeadc8f9746ae76d97ce1239e98b404efe5da3ee0b7149740f89ad6"
           ],
           "client_ip_address": "123.123.123.123",
           "client_user_agent": "$CLIENT_USER_AGENT",
           "fbc": "fb.1.1554763741205.AbCdEfGhIjKlMnOpQrStUvWxYz1234567890",
           "fbp": "fb.1.1558571054389.1098115397"
         },
         "custom_data": {
           "currency": "usd",
           "value": 123.45,
           "contents": [
             {
               "id": "product123",
               "quantity": 1,
               "delivery_category": "home_delivery"
             }
           ]
         },
         "event_source_url": "http://jaspers-market.com/product/123",
         "action_source": "website"
       }
     ]' \
  -F 'access_token=<ACCESS_TOKEN>' \
  https://graph.facebook.com/v25.0/<YOUR_PIXEL_ID_HERE>/events
The data that is sent to Meta via API is somewhat similar to the standard Pixel, with event name and parameters supported. The net new bits are user data such as IP address, email and phone number, with the latter requiring hashing. This is pretty much where server side tagging gets its core power from and without the ability of using user data in a server side capacity, you end up with only a small improvement on standard client side tagging.
The other key element is the Event ID, a unique timestamp or identifier to be able to allow Meta to dedupe this server side request with one that may have already occurred on the client side. If you do not do this, you end up with duplicated data which implicates reporting / optimisation significantly.
CAPI can be implemented in 3 different ways:
- As a CAPI Gateway approach, which is the easiest form and is now very much automated through Meta themselves. But this for me is a fake CAPI as it is dependent on your base pixel being implemented well and no real way to enrich / control it as you would with other setups.
- A partner approach where you can use different vendors / tag managers like Shopify / Tealium / GTM to implement via. This is ultimately the best practice if you plan to use server side tagging beyond just Meta and have other use cases in mind. But keep in mind certain systems like Shopify don’t allow much customisation.
- A direct approach where you build on the API yourself and plug in with any existing technology or 3rd party vendor. This is the most complex but for serious brands, is the most appropriate.
The reason CAPI is so powerful is that you can do more interesting things with the signals you want to pass into Meta. Whether this is from alternative sources like offline or app or even some more custom parameter like LTV, that you wouldn’t want to expose client side in the pixel, this is the opportunity that most advertisers would want to make use of. The core challenge of CAPI aside from the more technical setup is the fact that there are costs associated with it, but depends on the end advertiser as to how much it would be.
Other Pixel / CAPI callouts
We’ve spoken about the Pixel / CAPI dual setup existing at the same time and this remains the best practice for Meta at the time of writing.
The other core things to consider are the following:
- Event Match Quality (EMQ) is a number 1 to 10 of how Meta monitors the quality of signal going into Meta for each event. The higher the number, the more data signals you are giving Meta. You’d want to aim for at least 7/8 but in reality, this may not always be possible to achieve based on the vertical (regulated will always struggle) and data capture (you won’t have user data on non-authenticated page views).
- Auto Advanced Matching is the client side pixel way of doing what CAPI does with the user data payload. Instead of manually passing the data into the pixel / CAPI call, you let Meta’s JavaScript scrape your website and do it for you. Whilst this is beneficial for most ecommerce brands / verticals, certain ones are prohibited from using this feature due to the data privacy element of it.
- Core Setup is a setting that Meta automatically applies to a Pixel / Dataset, if it sees that the Pixel may be on a sensitive vertical like healthcare or financial services. This effectively means you lose the ability to pass custom data and certain events into Meta. This has had a lot of attention over time due to the health / wellness brands being categorised as this and therefore looking at ways to circumvent it, but ultimately Meta will always find / ban you if you attempt this, no matter what external parties who offer workarounds say.
- Auto Event Tracking is also a newer feature of Meta, that we will dig into shortly. This includes the ability to pop up an UI tool on your website and tag events accordingly without code, let Meta do it for you or even now agentic themed approach for Meta to use AI to look up schemas onsite to gather data on. Whilst this sounds amazing, I would always recommend not to do this as Meta makes mistakes and you cannot enrich it server side with CAPI easily unless you use the CAPI Gateway approach.
- Custom Events are still somewhat useful to consider creating / implementing with a Pixel or CAPI approach. But keep in mind that by default now, Meta will block custom events from actively showing in Events Manager until you go into Events Manager and manually approve it. This catches out a lot of agencies / dev teams who implement a custom event but struggle to see it fire in Dev / QA or even with the Meta Pixel Helper. Work with whoever owns the pixel to enable this whilst testing.
Advanced Troubleshooting & Meta’s Code
Now that we know how the Meta Pixel and CAPI operates, we can investigate a bit more on what Meta is actually doing behind the scenes alongside a few tips on how to debug a website when trying to understand how the Meta Pixel is implemented on it.
First we need to look at the way the Network calls behave on a website where the Meta pixel is implemented. This is the key to understanding the library behind the scenes that is doing both good and sometimes controversial things in the background.
1. Initialisation of the Meta Script
When a webpage loads, the Meta Pixel base code injected into the HTML executes. This script dynamically creates a script tag to fetch the main Meta Pixel library.
- The Network Call: A GET request to
https://connect.facebook.net/en_US/fbevents.jsfollowed by a secondaryhttps://connect.facebook.net/signals/config/[YOUR_PIXEL_ID_HERE]call - What it does: This downloads the heavy-lifting JavaScript library responsible for configuring the pixel, queueing events and handling data transmission.
2. The Configuration and Setup (fbq('init'))
Once fbevents.js loads, it executes the initialisation command that looks like fbq('init', 'YOUR_PIXEL_ID_HERE');.
- The Network Call: A GET request to
https://www.facebook.com/tr/with a query parameterev=noscript(or standard init parameters depending on the exact implementation). - What it does: It registers your specific Pixel ID with Meta's servers, establishes cookies (like the
_fbpfirst-party cookie) and prepares the environment to track user actions.
3. The Page Load (PageView)
By default, the standard Meta Pixel snippet includes fbq('track', 'PageView'); right after the initialisation.
- The Network Call: A POST or GET request to
https://www.facebook.com/tr/ - What it sends (Query/Payload):
id: Your Meta Pixel ID.ev: The event name (in this case, PageView).dl: The Destination URL (the exact page the user is on).rl: The Referral URL (where the user came from).ts: A timestamp.sw / sh: Screen width and height.
4. Custom & Conversion Tracking (Purchase, AddToCart etc)
When a user performs a specific action (like clicking "Buy Now" or arriving at a thank-you page), your website fires a specific tracking command, such as fbq('track', 'Purchase', {value: 49.99, currency: 'GBP'});.
- The Network Call: Another POST or GET request to
https://www.facebook.com/tr/ - What it sends:
ev: Purchasecd: (Custom Data) A JSON object stringified into the URL parameters containing information like{"value": 49.99, "currency": "GBP"}.ud: (User Data) If you have Advanced Matching turned on, this payload will include hashed user data (like SHA-256 encrypted emails or phone numbers).
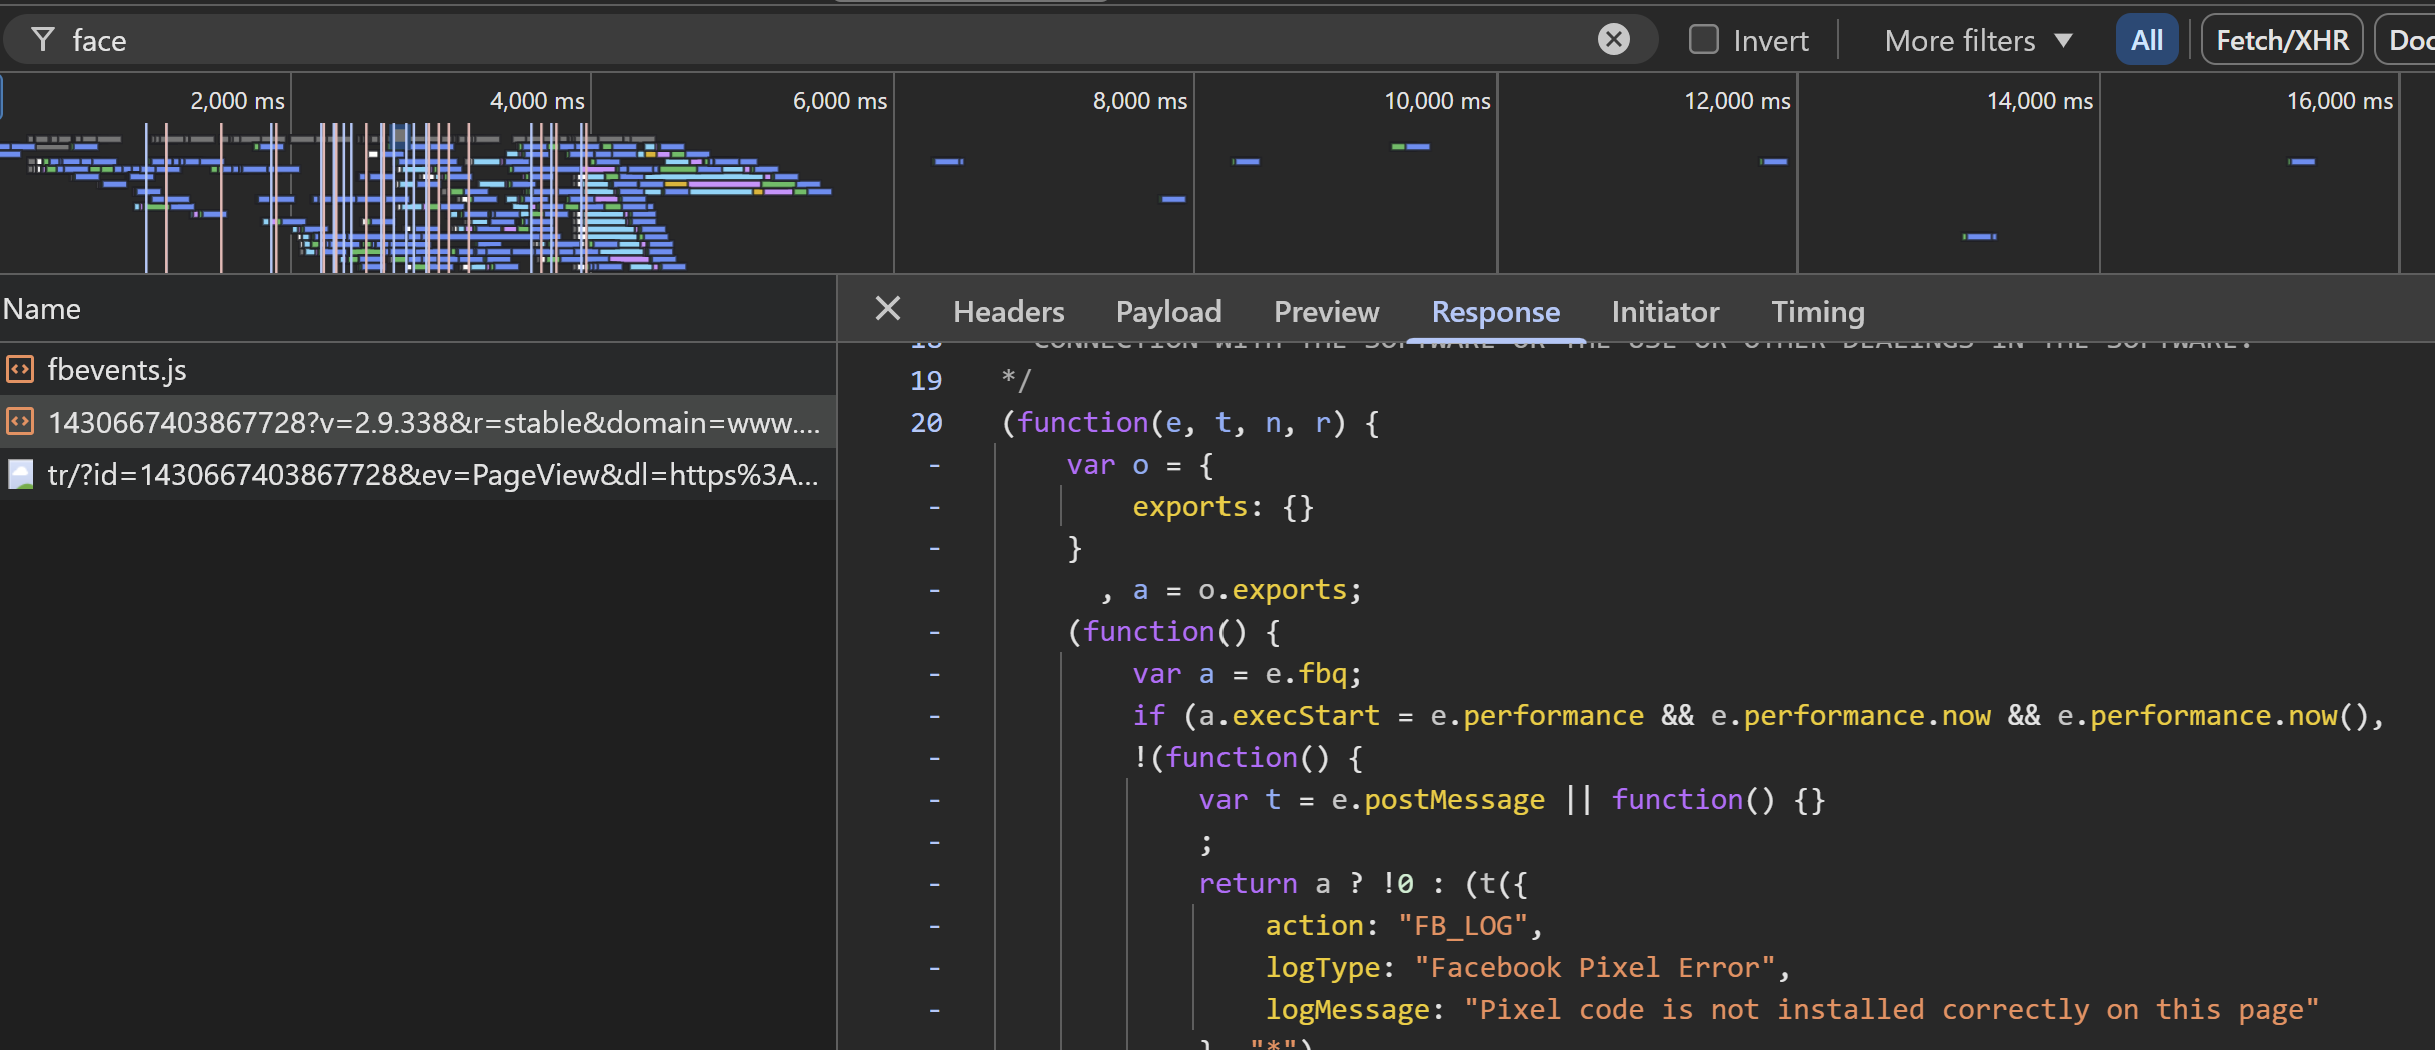
 Detailed View: Network Calls showing Pixel Payload and Event Parameters
In order to debug this in real time on a website, you can do this in a variety of ways:
- Use Meta’s official extension called Meta Pixel Helper.
- Use 3rd party tracking extensions like Omnibug.
- Go into the network calls directly and filter by “facebook” or your unique Pixel ID to see this.
For the more technical users, you can also dig a bit deeper for your specific pixel ID, to see how Meta has added certain settings / limitations to this. Whilst some of this is controlled by you in the Events Manager settings such as allow list / block lists for domains or configuration of using 1st party cookies / advanced matching, some are defined by Meta’s internal systems and the only way to see it is by investigating this next part.
Code Investigation and Tips
In order to do this, we need to find the config setup from step 1 above, which only works if the Meta Pixel has been implemented with JavaScript instead of an image tag.
Look up https://connect.facebook.net/signals/config/[YOUR_PIXEL_ID_HERE] in the network call and make sure it has a Status Code of 200, to ensure it fired.
Now click the network call and go to the Response tab. This is Meta’s response to the call, filtered to your specific Pixel ID (as a whole not on an event level).
 Detailed View: Browser Network Tab filtered to Signals Config and Response Tab Window
Here is where the fun happens and you can investigate this JavaScript code that has a mix of the base Meta client library and elements to you. This also showcases the latest tweaks Meta has been doing to their pixel over time, whether it was the introduction of AEM to combat iOS14.5 in the past or the Privacy Sandbox integration for the doomed Google Chrome 3P cookie free world, it is all on show here. These are the ones which are my favourites:
config.set("PIXEL_ID", "cookie", {
    "fbcParamsConfig": {
        "params": [{
            "prefix": "",
            "query": "fbclid",
            "ebp_path": "clickID"
         }, {
            "prefix": "aem",
            "query": "brid",
            "ebp_path": "aem"
         }, {
            "prefix": "waaem",
            "query": "waaem",
            "ebp_path": ""
         }]
     },
    "enableFbcParamSplitAll": true,
    "maxMultiFbcQueueSize": 5,
    "enableFbcParamSplitSafariOnly": true,
    "enableAemSourceTagToLocalStorage": true,
    "enableBetterFbcDetection": true
 });
The above shows how Meta leverages a multiple of signals over time to stitch together and effectively do attribution with. It has evolved based on fbclid now becoming at risk as a query parameter with certain browsers.
config.set("[PIXEL_ID]", "automaticMatching", {
    "selectedMatchKeys": ["em", "fn", "ln", "ge", "ph", "ct", "st", "zp", "db", "country", "external_id"]
 });
The above shows where Advanced Matching has been enabled and for what user data parameters it is working with, closely followed by a instance.optIn("[YOUR_PIXEL_ID_HERE]", "AutomaticMatching", true); line if it is done automatically vs manual.
fbq.loadPlugin("iwlbootstrapper");
instance.optIn("[YOUR_PIXEL_ID_HERE]", "IWLBootstrapper", true);
fbq.loadPlugin("iwlparameters");
instance.optIn("[YOUR_PIXEL_ID_HERE]", "IWLParameters", true);
fbq.set("iwlExtractors", "[YOUR_PIXEL_ID_HERE]", []);
fbq.loadPlugin("openbridge3");
instance.optIn("[YOUR_PIXEL_ID_HERE]", "OpenBridge", true);
The above is the magic of how Meta operates its own unique browser and still requires the means to stitch data together within. Ever noticed when you click on an ad from Facebook or Instagram on mobile, you go to a custom webview browser? This is owned by Meta which operates with its own rules and therefore the Pixel needs to have the ability to capture / leverage data from it.
Elements of the IWL specific component here is used for Meta's event creation tool that we will cover shortly, where you get an UI no-code approach to tagging events with Meta.
config.set("[PIXEL_ID]", "eventValidation", {
    "unverifiedEventNames": [Custom1],
    "restrictedEventNames": []
 });
fbq.loadPlugin("eventvalidation");
instance.optIn("[YOUR_PIXEL_ID_HERE]", "EventValidation", true);
fbq.loadPlugin("prohibitedsources");
instance.optIn("[YOUR_PIXEL_ID_HERE]", "ProhibitedSources", true);
config.set("[YOUR_PIXEL_ID_HERE]", "unwantedData", {
    "blacklisted_keys": {
        "PageView": {
            "cd": [visitor_id],
            "url": ["email"]
         }
     },
    "sensitive_keys": {}
 });
The above is a very important one for both the implementation of custom events into Meta and how Meta spots / blocks sensitive data. Currently if you send a custom event to a Meta Pixel, you have to manually allow it within Events Manager settings. If you do not, it will not actively fire or show up in Events Manager reporting. This can be showcased in the code above.
Secondly if you pass events, custom parameters (cd above) or query parameters in the URL on purpose or by mistake that is prohibited by Meta, you will see it blocked in the code above where I have used visitor_id as a parameter & email as a query parameter in the URL as examples. Key here is that there is no way to override or adjust this without creating a new Pixel ID, so be warned not to break Meta’s rules.
config.set("[PIXEL_ID]", "botblocking", {
    "rules": {
        "spider_bot_rules": "x”,
        "browser_patterns": "y”
     }
 });
fbq.loadPlugin("botblocking");
instance.optIn("[YOUR_PIXEL_ID_HERE]", "BotBlocking", true);
The above shows how Meta has built in rules to spot bots / invalid traffic, using some standard browser level best practices alongside custom pieces. Due to the sheer amount of code here, I have removed it from the example.
config.set("[PIXEL_ID]", "gating", {
    "gatings": [{
        "name": "content_type_opt",
        "passed": true
     }, {
        "name": "experiment_xhr_vs_fetch",
        "passed": true
     }, {
        "name": "offsite_clo_beta_event_id_coverage",
        "passed": false
     },
The above is an interesting one to monitor how Meta every so often puts certain features onto a Pixel ID level vs its entire userbase. This may be for upcoming betas or more formal integrations, especially with Shopify.
instance.optIn("[PIXEL_ID]", "ProtectedDataMode", true);This is the JavaScript spot to tell whether a pixel is on Core Setup mode or not, regardless of whether you have access to the Pixel in Events Manager or not.
config.set("[PIXEL_ID]", "ccRuleEvaluator", {
    "ccRules": [{
        "id": "1234",
        "rule": {
            "and": [{
                "event": {
                    "eq": "AddToCart"
                 }
             },
             {
                "or": [{
                    "URL": {
                        "i_contains": "search"
                     }
                 }, {
                    "URL": {
                        "i_contains": "display"
                     }
                 }]
             }]
         }
     },
The above is where you can see any Custom Conversion logic associated with the Pixel ID, which is again good for troubleshooting if you don’t have direct access to the Pixel itself in Events Manager.
fbq.loadPlugin("estruleengine");
instance.optIn("[YOUR_PIXEL_ID_HERE]", "ESTRuleEngine", true);
fbq.set("estRules", "[YOUR_PIXEL_ID_HERE]", [{
     "condition": {
         "type": 1,
         "conditions": [{
            "targetType": 1,
            "extractor": 2,
            "operator": 2,
            "action": 1,
            "value": "submit"
          }]
      },
     "derived_event_name": "Purchase",
     "transformations": [1],
     "rule_status": "ACTIVE",
     "rule_id": "3210"
 }]);
The above is how to spot whether a Pixel is being used with the Auto Events feature described previously, which I recommend not to use.
 Detailed View: Meta's In-built Auto Event / EST Rule Engine Setup inside the Config Code
The EST engine is Meta’s in-built tag manager that allows the user to create rules based on URLs / buttons and assign it to an Event name. If this section exists in the JavaScript call, then it is in use.
The ce-est parameter is also a good way to spot it when looking at the network call / pixel helper for these type of events, it will show up with this parameter.
My Meta Tracking Tips
Now that we have gone through the basics & advanced elements of Meta tracking, this is what I would recommend for any advertiser to have as a baseline if running Meta:
✔️ The Do's
- Implement CAPI as a bare minimum.
- Use a Direct or Partner approach to CAPI.
- Map Business Goals to Standard Events.
- Implement Event / Parameter passback.
- Build Custom Conversions for Search Lift.
❌ The Don'ts
- Just run a client side Pixel only.
- Assume CAPI Gateway = effective CAPI.
- Use Custom Events only.
- Use Meta's Auto Event tools.
- Keep Meta measurement in a silo.